

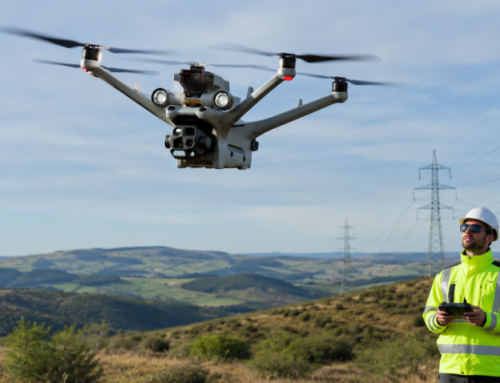
Drone photography has changed how we capture the world. You can now take breathtaking shots from hundreds of feet in the air—without hiring a helicopter or spending a fortune. With the right drone and skills, you can shoot landscapes, cityscapes, and action shots that were once impossible.
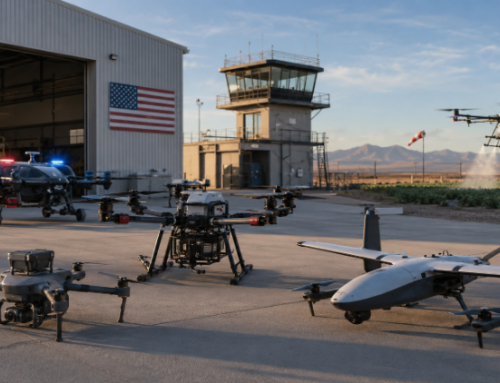
The global drone market is expected to hit $54.6 billion by 2030. In the U.S. alone, over 1 million have been drones registered with the Federal Aviation Administration (FAA) as of February 2025. There are 409,408 commercial drone registrations, and 385,892 for recreational flyers. TRUST Certificates stand at 977k. See current stats here.
Aerial photography is booming, and it’s not just professionals cashing in. Hobbyists, influencers, and small business owners are all getting in on the action.
But flying a drone is only half the story. If you want crisp, cinematic shots, you need to know your camera settings. If you want to avoid fines, you have to know the laws. And if you want photos that make people stop scrolling, you have to master composition, lighting, and editing.
This guide covers everything. Whether you’re buying your first drone or perfecting long-exposure night shots, you’ll find the tips, techniques, and tools to take your drone photography to the next level.
Getting Started with Drone Photography
Choosing the Right Drone
Not all drones are built the same. Some are perfect for travel. Others are designed for high-end filmmaking. And then there are models that try to do everything and come with the price tag to match.
Choosing the right one comes down to what you need. Do you want smooth 4K footage? Are you shooting real estate or capturing fast-moving action? Or maybe you just want to experiment without spending a fortune.
Let’s break it down.
Built-in vs. Attachable Cameras
These are the likes of the Autel Evo Lite+ or DJI Mavic 3—lightweight, balanced, and easy to control. But you’re stuck with the camera they come with. Capabilities are fixed to the capacity of the sensors throughout the life of the drone.
Attachable camera drones—like the DJI Matrice 350 or Freefly Alta X—let you mount professional cameras. That means better lenses, bigger sensors, and more control over the final image. The downside? They cost more, weigh more, and require extra stabilization.
For most photographers, built-in cameras are the better choice. They’re more compact, easier to fly, and require less setup. For enterprise users, drones with flexible payloads give you more range to pick the optimal cameras for your needs.
Entry-Level, Mid-Range, and Professional Drones
Not all drones cost thousands of dollars. Some cost less than a dinner out. But there’s a reason for that.
- Entry-Level Drones ($100–$600) – These are great for learning. They’re lightweight, easy to control, and won’t break your heart if they crash. But don’t expect high-end image quality. Most shoot at 1080p HD or lower, have short battery life (10–20 minutes), and lack gimbal stabilization.
- Mid-Range Drones ($600–$1,500) – This is where you’ll find the best balance of price and quality. Most mid-range drones shoot 4K video, offer mechanical gimbals for stabilization, and have longer flight times (25–35 minutes). If you’re serious about drone photography, start here.
- Professional Drones ($1,500–$10,000+) – These are built for commercial use. They shoot 5.1K to 8K video, support RAW photo formats, and have interchangeable lenses. Some ccan even track subjects with AI-powered obstacle avoidance. If you’re working on high-end productions, this is what you need.
Top Drone Brands
A few companies dominate the market.
- DJI – The biggest name in drones. Known for user-friendly controls, high-quality cameras, and strong battery life. Their lineup includes everything from beginner models (Mini 3) to high-end filmmaking drones (Inspire 3).
- Autel Robotics – A solid alternative to DJI. Their Evo series offers 4K to 6K cameras, great low-light performance, and no geofencing restrictions.
- Parrot – Focused on compact and industrial drones. The Anafi series is lightweight and portable but lacks the image quality of DJI and Autel.
If you’re new, start with a mid-range drone. Something with 4K, a gimbal, and at least 25 minutes of flight time. If you’re upgrading, go for better sensors and interchangeable lenses.
Understanding Key Drone Camera Features
Your drone’s camera decides how sharp, smooth, and professional your shots look. It’s not just about having a high-resolution sensor. Frame rates, stabilization, and real-time streaming all make a huge difference.
Resolution: More Pixels, Better Detail
A higher resolution means sharper images.
- 720p (HD) – Outdated. You won’t find this on any decent drone today.
- 1080p (Full HD) – The bare minimum for acceptable quality. Good for casual flyers, but lacks the detail needed for pro-level work.
- 2.7K – A middle ground. Sharper than 1080p, but still not industry standard.
- 4K Ultra HD – The gold standard for drone photography. Offers crisp details, making it ideal for landscapes, real estate, and cinematic footage.
- 5.1K and 8K – Overkill for most people. Used in high-end filmmaking where zooming in without losing quality matters.
If you’re serious about quality, go for at least 4K.
Frame Rates: 30 FPS vs. 60 FPS?
Frame rate affects how smooth your footage looks.
- 30 FPS (Frames Per Second) – The standard for cinematic drone videos. Smooth enough for most purposes.
- 60 FPS – Great for slowing down footage in post-production. Essential for sports and action shots.
- 120 FPS+ – Found in high-end drones for super slow-motion effects. Not necessary for most users.
If you’re shooting a real estate video, 30 FPS is fine. If you want to capture waves crashing or fast-moving cars, go for 60 FPS or higher.
Live Streaming: Real-Time Aerial Views
Not all drones let you stream your footage live. If you want to broadcast straight to your audience, look for drones with low-latency live streaming. For instance, the DJI Mavic 3 can transmit 1080p video in real time up to 9 miles away.
Some professional drones support multi-camera streaming, making them useful for events and news coverage.
Older drones rely on SD card storage, meaning you have to wait until after the flight to see your footage.
Live streaming is huge for real estate, social media, and event coverage. If you plan to share your shots in real-time, make sure your drone supports it.
Gimbal Stabilization: 2-Axis vs. 3-Axis
A shaky drone ruins your footage. That’s where gimbals come in.
- 2-axis gimbals stabilize tilt and roll but not pan. Your footage might still look shaky when the drone moves side to side.
- 3-axis gimbals stabilize tilt, roll, and pan—resulting in butter-smooth video.
If you’re serious about smooth footage, 3-axis gimbals are non-negotiable. Most premium drones come with one.
A 4K camera, 60 FPS option, live streaming, and 3-axis gimbal will give you professional-level footage.
Essential Accessories for Drone Photography
A drone without the right accessories is a disaster waiting to happen. Batteries die too fast. Propellers snap. Storage fills up at the worst moment.
And then there’s exposure. The wrong lighting can wreck an otherwise perfect shot.
If you want smooth flights, sharp images, and fewer mid-air disasters, you need the right gear.
Extra Batteries: Stay in the Air Longer
Most drone batteries last 20 to 30 minutes. Some lower-end models don’t even give you 15 minutes before forcing a return. That’s barely enough time to set up your shot, let alone experiment with angles.
One battery isn’t enough.
Serious drone photographers carry at least three fully charged batteries. If you’re doing a full-day shoot, five or more is even better.
DJI’s Intelligent Flight Batteries can push flight times with 18-46 minutes, depending on the drone model and flight conditions. Autel’s EVO II batteries last long as well, but take longer to recharge.
Some professional drones use dual battery setups, extending flight times to nearly an hour.
Without extras, you’re grounded before you even get started.
Tip: Invest in a portable charging staton like DJI Power 1000 that you can use to charge your drone about a dozen times while out in remote areas. It also charges your other devices – mobile phones, laptop, camping lights and even coffee machines.
ND Filters: Control Exposure Like a Pro
Ever taken a shot where everything looks too bright, washed out, or overexposed? That’s what happens when too much light hits the sensor.
Neutral density (ND) filters fix that.
These filters work like sunglasses for your drone’s camera, cutting down on excess light and letting you use slower shutter speeds for smoother motion blur.
Here’s what you need:
- ND 4 – Best for low-light conditions like sunrise or sunset.
- ND 8 – Ideal for slightly bright days, softening highlights without darkening shadows.
- ND 16 – Perfect for bright midday sun. This one gets used most often.
- ND 32 or 64 – Made for extreme brightness, like snow-covered mountains or beach shoots.
Learn more about them here: What Are ND Filters and Why You Need Them For Your Drone Camera
Propeller Guards and Spare Propellers: Avoid Mid-Air Disasters
Propellers are fragile. One crash into a tree or wall, and you’re done.
Even the best pilots make mistakes. A gust of wind can throw off your flight. Birds can get curious. Crowded areas make flying way more stressful.
- Propeller guards protect your blades from collisions. They won’t stop a major crash but can prevent minor bumps from turning into major damage.
- Spare propellers are a must-have. Many drones won’t even fly if one blade is chipped or bent.
DJI sells quick-release propellers that snap on in seconds. Always carry at least two full sets in your bag.
Extra SD Cards: Never Run Out of Storage
Drone footage eats up storage fast.
A 2-minute 4K video can use up 1GB of space. If you’re capturing RAW images, files are even larger.
- 64GB SD cards fill up within an hour of shooting.
- 128GB and 256GB cards are better but can still run out during long shoots.
- High-speed UHS-II cards improve recording speeds and prevent lag.
The right accessories mean longer flights, sharper shots, and fewer headaches. Without them, you’re stuck with short flights, shaky footage, and frustrating interruptions.
Gear up before you fly. It’s the difference between a smooth shoot and a wasted day.
Learning to Fly Your Drone
Flying a drone looks easy—until you crash into a tree. Or a power line. Or worse, someone’s car.
Most first-time crashes happen because people skip the basics. They fire up their drone, take off, and hope for the best. That’s a terrible plan.
Flying well takes practice. A lot of it.
Before you even touch the controls, read the instruction manual. Different drones have different flight modes, safety settings, and emergency landing options. Knowing what yours can and can’t do will save you money in repairs.
If you’re flying indoors, avoid small rooms. Large gyms, empty garages, or warehouses work better. Just stay away from ceiling fans.
Outdoors, you need a wide-open area. No trees, no power lines, no people. A field or an empty parking lot is best. Wind is your enemy, so pick a calm day. Anything above 15 mph makes control difficult.
The Basics: Takeoff, Hovering, and Landing
Takeoff isn’t as simple as pushing the throttle. A weak takeoff makes your drone unstable. Always lift off quickly to about 3 feet, then hover.
Hovering is where most new pilots struggle. Drones don’t always stay in one place, even with GPS. Small wind gusts or control stick pressure can send them drifting. Stay steady. Use small, gentle adjustments. If you can hover for 30 seconds without drifting, you’re on the right track.
What about landing? Most crashes happen when pilots rush the descent. The trick is to lower your drone slowly. If it wobbles, go back up a few feet, stabilize, then try again. Never slam your drone into the ground.
Common Beginner Mistakes (And How to Avoid Them)
- Overcorrecting movements – Sudden, jerky controls make your footage shaky. Move the sticks gently.
- Flying too far, too fast – Losing signal mid-flight is a nightmare. Keep your drone close at first.
- Ignoring battery life – Most drones warn you when battery levels drop. Land before it reaches 15%.
- Not calibrating the compass – A miscalibrated compass can send your drone flying in the wrong direction.
Start slow. Master the basics. And never fly near things you can’t afford to hit.
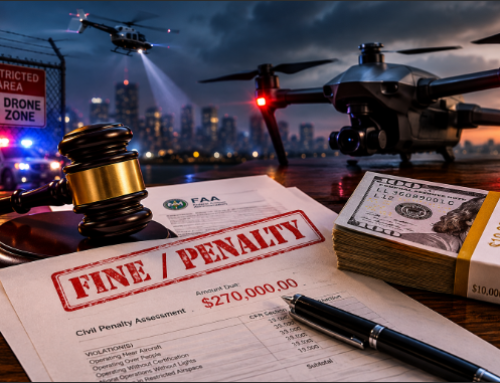
Legal and Safety Considerations
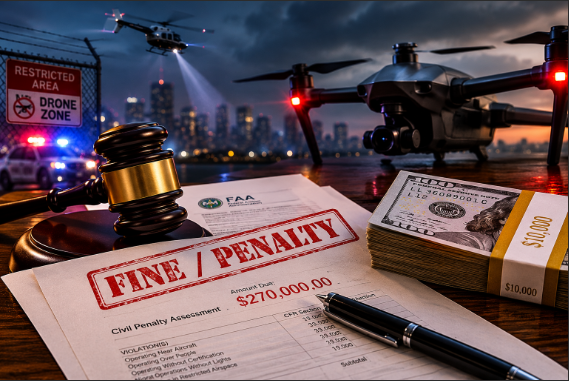
Drones crash. Batteries fail. Signals drop. And if you’re not careful, fines add up fast. As you fly your drone, you want to avoid disasters—both in the air and on your wallet. If you don’t know the rules, you could end up grounded—or fined thousands of dollars.
FAA Registration: Do You Need It?
Not all drones require registration, but most do.
- If your drone weighs more than 0.55 lbs (250g), you must register with the FAA before flying.
- If you’re using your drone for business or paid work, you need a Part 107 license. Cost for the examination is s $175.
- The FAA registration fee is $5 and lasts three years.
Failing to register can cost you up to $27,500 in civil penalties. And if the FAA decides to pursue criminal charges, that jumps to $250,000 and up to three years in prison.
No-Fly Zones and Geofencing: Where You Can’t Fly
Not all airspace is open. Some places are off-limits—no exceptions.
- Airports – Stay at least five miles away unless you have clearance.
- Military bases and government buildings – Instant no-fly zones. Flying here can get you investigated.
- National parks – Most prohibit drones entirely. Fines can hit $5,000 if you’re caught.
- Crowds and public events – Flying over concerts, protests, or large gatherings is illegal without approval.
Modern drones use geofencing—a GPS-based system that prevents takeoff in restricted areas. But geofencing isn’t perfect. Some zones require manual unlocking with FAA approval.
Related Reading: Geofencing UPDATE: DJI Removes Automatic No-Fly Zones
Privacy Laws: Don’t Get Sued
Privacy laws apply when using drones with cameras.
- Filming someone without consent on private property is illegal. If they can prove harassment or surveillance, lawsuits are on the table.
- Flying too close to homes can trigger complaints. In some states, you can face trespassing charges—even if you never land.
- Commercial drone pilots must be extra careful. Clients might ask for shots that break privacy laws. If you say yes, you’re responsible.
Always ask yourself: Would I be okay with a drone hovering outside my window? If the answer is no, don’t do it.
Pre-Flight Checklist
A drone crash can happen in seconds. A gust of wind. A weak battery. A simple mistake. Most of these problems are avoidable. But only if you check everything before takeoff. Skipping a pre-flight inspection is how drones end up lost, broken, or in someone’s backyard.
Check the Weather: Wind, Rain, and Visibility
Bad weather ruins flights. It’s that simple.
- Wind over 15 mph? Your drone will struggle to stay stable.
- Fog or mist? Your camera lens will collect condensation.
- Temperatures below freezing? Battery life will drain twice as fast.
Use a weather app before you leave the house. If conditions look bad, reschedule. Flying in rough weather risks losing your drone for good.
Battery Status: Don’t Get Stranded in the Sky
A weak battery is a disaster waiting to happen.
Most drone batteries last 20–30 minutes, but that depends on conditions. Cold weather, aggressive flying, and high wind speeds drain batteries faster.
- Charge all batteries to 100% before flying.
- Avoid using swollen, damaged, or old batteries—they can fail mid-flight.
- When battery levels reach 20%, be looking to land to avoid an emergency landing.
Inspect Propellers and Motors
Damage to the propellers can cause unbalanced flight, vibrations, or total failure.
- Check each propeller for cracks, bends, or loose screws.
- Spin the motors manually. If they feel stuck or grind, don’t take off.
- Carry a spare set of propellers. If one breaks mid-flight, you’re grounded.
Calibrate GPS and Compass
Your drone relies on GPS to stay stable in the air. A bad signal can send it flying in the wrong direction.
- Check the GPS connection before takeoff. A weak signal = unstable flight.
- Calibrate the compass if flying in a new location. Metal, buildings, and power lines can interfere.
- Enable Return-to-Home (RTH). If your drone loses signal, it will fly back automatically.
Stay in areas with strong signals.
Camera Settings: Get It Right Before Takeoff
Nothing’s worse than struggling to get the perfect shot—only to realize your settings were wrong.
- Set your resolution. 4K for pro shots, 1080p for casual use.
- Adjust white balance. Auto works, but manual is more reliable.
- Check storage. A full SD card = wasted flight time.
Drone Photography Techniques for Stunning Shots
A drone can go anywhere. That doesn’t mean every shot looks good.
Composition Fundamentals for Drone Photography
Flying high doesn’t automatically make a photo interesting. You still need to frame your subject, balance the elements, and lead the viewer’s eye. A bad composition is just as bad from 300 feet up.
Get these fundamentals right, and your drone shots will stand out.
The Rule of Thirds: Stop Centering Everything
Your drone’s camera should have a grid overlay—two vertical and two horizontal lines dividing the frame into nine sections. The best compositions place key subjects where these lines intersect.
- Shooting a coastline? Place the horizon along the upper or lower third, not the middle.
- Capturing a road cutting through a forest? Position it along one of the vertical lines.
- Filming a lone subject, like a house or vehicle? Place it off-center for better balance.

Symmetry: Use Reflections, Roads, and Natural Patterns
Drones are made for symmetry. Aerial view enable you to take advantage of mirror-like reflections, straight roadways, and geometric layouts you won’t see from the ground.
Use that.
- Lakes and rivers create near-perfect symmetrical reflections. Position the waterline in the middle of the frame.
- Bridges, runways, and highways create clean, straight compositions when shot from above.
- City grids and farmland naturally divide into strong repeating patterns—use those for structure.
Symmetry makes a photo feel balanced. It pulls the viewer in instantly.

Leading Lines: Make the Viewer’s Eye Move
Good drone shots guide the viewer’s attention. The best way to do that? Leading lines.
Roads, rivers, train tracks, fences, even rows of crops—they all create natural paths through a photo. Use those to direct the eye.
- A winding road in a desert? Frame it so it leads toward the subject.
- A long pier stretching into the ocean? Place it starting from the bottom and extending upward.
- A railway cutting through a dense forest? Align it diagonally for more depth and movement.
Leading lines make a flat image feel dynamic. They pull people into the shot.

Foreground vs. Background: Add Depth
Drone photos often feel flat because they lack foreground elements. But adding depth changes everything.
Foreground elements create layers. They add a sense of scale. And they make drone shots feel less like maps and more like real places.
- Flying low over a rocky beach? Include the cliffs in the foreground, with the ocean stretching out behind.
- Shooting a cityscape? Capture part of a rooftop or building edge in the lower frame.
- Filming mountains? Let the nearest peaks take up part of the bottom third, with distant peaks in the background.
Depth separates a snapshot from a stunning image.

Using Shadows and Contrast for Dramatic Shots
Lighting changes everything. The same scene can look soft and flat at midday but moody and intense at sunrise or sunset.
Shadows add depth, drama, and structure. If you ignore them, you’re wasting the best part of aerial photography.
- Sunrise and sunset create long, stretching shadows that emphasize shapes and textures.
- Forests and buildings cast bold shadows that add depth.
- Cloud shadows over landscapes add natural contrast, making the photo more dramatic.
Shoot when shadows are longest. Your drone images will instantly stand out.

Essential Drone Photography Angles
A drone lets you capture angles no handheld camera can. But most pilots shoot from the same boring perspectives—a few high-altitude shots, maybe a slow pan, then they pack up.
That’s a mistake.
Angles matter. A slight adjustment in position can turn a basic shot into a cinematic masterpiece. If you’re serious about standing out, use these four essential angles.
The Top-Down (Bird’s-Eye) View: A Completely New Perspective
Most people only see the world from eye level. A top-down drone shot flips everything on its head.
It removes the horizon, eliminates depth, and turns everyday scenes into abstract compositions. Cities look like blueprints. Forests become textured patterns. Roads cut through fields like veins.
The best subjects for bird’s-eye shots:
- Beaches and coastlines – The meeting of water, sand, and land creates natural contrast.
- Urban streets and crosswalks – Buildings, roads, and people form geometric patterns.
- Boats on water – Isolated subjects look even more striking from above.
- Sports fields and arenas – The symmetry is perfect for composition.
Fly straight up, point the camera directly down, and shoot in RAW to capture every detail.

The Pull-Away Shot: Create a Sense of Scale
Ever seen a drone shot where the subject stays in place while the background widens dramatically? That’s the pull-away shot. It makes a small object feel tiny compared to its surroundings.
This works best with:
- Solo hikers or travelers – Pull back to reveal vast landscapes behind them.
- Isolated buildings in remote areas – Show how small they are compared to nature.
- Winding roads – Zoom out to reveal how far they stretch.
Start tight on your subject, then slowly ascend and pull back. Keep the movement smooth and steady. If your drone has cinematic mode, turn it on for better stabilization.
This shot adds drama instantly.

Low-to-Ground Tilt-Up: Get Cinematic Without a Gimbal
Most drone shots are too high. Sometimes, the best perspective is just a few feet off the ground.
A low-to-ground tilt-up mimics a classic Hollywood jib shot. Instead of flying high and flat, you fly low and forward, tilting the camera up as you move.
This technique is perfect for:
- Dramatic reveals of mountains, skyscrapers, or cliffs.
- Tracking vehicles or people moving through a scene.
- Adding tension before an epic wide shot.
Fly just a few feet off the ground, start with the camera angled slightly downward, then slowly tilt up as you move forward. If done right, it feels like a professional crane shot.

The Point-of-Interest (POI) Orbit
If you want to make your footage look cinematic, learn the orbit shot.
This move keeps your subject perfectly centered while the drone flies in a smooth circular path around it. It’s one of the most dynamic ways to highlight a person, building, or landmark.
Ideal for:
- Monuments and statues – Keep them centered while circling around.
- Vehicles or people in motion – Adds a sense of action without shaky camera work.
- Weddings and events – A 360-degree orbit captures everything happening in the moment.
Most drones have Point of Interest (POI) mode—a feature that locks onto a subject and flies a perfect circle around it. But manual orbits look more natural.
- Start slow and keep your subject centered.
- Use small stick movements to keep the motion smooth.
- If your drone has Tripod Mode, turn it on for extra precision.
An orbit shot instantly makes footage feel professional.
Most drone photographers only use one or two angles. That’s a huge waste of potential.
Top-down shots create abstract art from everyday scenes. Pull-away shots reveal scale and distance. Low-to-ground tilt-ups add Hollywood-style movement. And orbit shots make subjects stand out with cinematic motion.
Next time you fly, try them all. Your shots will never look the same again.
Drone Camera Settings Tips
A drone’s camera doesn’t think for you. Auto mode is fine for beginners, but if you want crisp details, balanced exposure, and true-to-life colors, you need to control the settings yourself.
Small changes in shutter speed, white balance, or ISO can make or break your shot. And if you rely on auto settings, you’re letting your drone make creative decisions for you.
Don’t do that. Take control.
RAW vs. JPEG: Choose the Right Format
If you’re still shooting JPEG, you’re losing details before you even start editing.
- JPEG files are compressed. Your drone decides what information to keep and what to throw away. That means less detail, less flexibility, and lower-quality images.
- RAW files store every bit of data. No compression, no lost details. You get full control over exposure, highlights, and shadows when editing.
Yes, RAW files are larger—sometimes 40MB or more per image. But storage is cheap. Losing a great shot to bad compression isn’t worth it.
Shoot RAW. Always.
ISO, Shutter Speed, and Aperture: Finding the Balance
A drone camera works just like any other camera. Light enters through the lens, hits the sensor, and gets processed into an image. But the wrong settings can leave you with blurry, overexposed, or grainy shots.
ISO: Keep It Low
ISO controls how sensitive your sensor is to light.
- Low ISO (100-200) = Clean, noise-free images.
- High ISO (800-3200) = Brighter shots but with visible grain and noise.
Drone sensors aren’t great in low light, so increasing ISO too much ruins sharpness. Always start at ISO 100 or 200, then adjust only if absolutely necessary.
Shutter Speed: Match It to Your Shot
Shutter speed controls how long your sensor is exposed to light.
- Fast shutter (1/1000s or higher): Freezes motion. Great for action shots, moving cars, or waves crashing.
- Slow shutter (1/30s or lower): Adds motion blur. Best for cinematic movement but requires ND filters in bright conditions.
For still photography, use 1/200s or faster. If you’re shooting video, follow the 180-degree rule—your shutter speed should be twice your frame rate (e.g., 1/50s for 24fps footage).
Aperture: Not Always Adjustable
Most consumer drones have fixed apertures—meaning you can’t change them.
- The DJI Mavic 3 has an adjustable aperture (f/2.8–f/11), giving more control.
- The Mini 3 Pro is locked at f/1.7, which is great for low light but can overexpose bright scenes.
If your drone doesn’t have an adjustable aperture, use ND filters to compensate for brightness.
White Balance: Stop Letting Auto Mode Ruin Your Colors
Your drone doesn’t technically know what color white is. If you let it choose, you might end up with unnatural blues, yellows, or greens.
Instead of Auto White Balance (AWB), use these presets:
- 5600K (Daylight Mode) – Best for sunny conditions.
- 3200K (Tungsten Mode) – Reduces yellow tones in artificial light.
- Cloudy Mode (6000K-6500K) – Warms up dull, overcast conditions.
Or just set it manually. If your footage looks too warm, lower the Kelvin value. If it looks too cool, increase it.
HDR Mode: When to Use It
HDR (High Dynamic Range) combines multiple exposures into one shot, keeping details in both shadows and highlights. It’s useful for:
- Sunsets and sunrises – Balances bright skies with dark foregrounds.
- Forests and mountains – Keeps shadowed areas from looking muddy.
- Cityscapes at night – Helps control bright lights without losing detail.
But HDR doesn’t work for moving subjects. If your scene has motion, stick to single-exposure RAW shots. More on HDR mode later on.
Capturing Motion in Drone Photography
Drone photography isn’t always about getting a clear image. You can also capture movement movement in a way that tells a story. A frozen subject works for some shots, but motion blur can make an image feel alive.
Slow Shutter Speeds for Motion Blur
Motion blur makes your shots look smooth and dynamic. It shows movement instead of freezing it in place.
To get it, slow down your shutter speed.
- 1/30s to 1/60s – Great for adding blur to fast-moving water, crowds, or vehicles.
- 1/10s to 1/5s – Stronger blur effects for waves, waterfalls, or running animals.
- 1 second or longer – Used for extreme motion blur, but nearly impossible to do handheld.
Here’s the problem: A slow shutter lets in too much light. That’s why ND filters are essential. They cut down on brightness so you can shoot at slow speeds without overexposing the shot.
A ND16 filter is a good starting point. If it’s still too bright, move up to ND32 or ND64.
Freezing Fast-Moving Subjects with High Shutter Speeds
If your settings aren’t right, a moving subject will look soft and blurry instead of sharp and detailed.
Fast shutter speeds stop motion completely. They work best for:
- Sports photography – Capture runners, cyclists, or race cars without blur.
- Wildlife shots – Freeze birds, waves, or animals mid-motion.
- Action-packed city scenes – Get crisp images of traffic, moving crowds, or street performers.
Shutter speed settings:
- 1/500s – Good for general movement.
- 1/1000s – Better for high-speed subjects like cars or animals.
- 1/2000s or higher – Freezes motion completely, even for birds in flight.
If you want sharp movement with no blur, go as high as possible. But keep an eye on your ISO—a higher shutter speed means you’ll need more light.
Panning Techniques for a Cinematic Feel
Panning is one of the hardest skills to master—but it makes drone footage look incredibly smooth.
The goal is simple: Move your drone at the same speed as your subject. This keeps the subject sharp while the background blurs.
How to do it:
- Fly parallel to your subject – Match their speed exactly.
- Use Tripod Mode (if available) – Slows down drone movements for more control.
- Set shutter speed between 1/30s and 1/60s – Keeps motion blur without losing focus.
- Use ND filters – Prevents overexposure when shooting in bright light.
Panning works great for tracking cars, boats, trains or runners. It makes footage feel cinematic and adds energy to any moving subject.

Maximizing Flight Time and Battery Efficiency
Battery life is your biggest limitation. If your drone runs out of power mid-flight, it’s coming down whether you’re ready or not.
Most drones last 20 to 30 minutes per charge—less in strong winds or cold weather. That’s not enough time to waste on bad planning or unnecessary maneuvers.
If you want longer, more productive flights, you need to manage every second in the air.
Reduce Unnecessary Movements
Every movement drains power.
Aggressive flying, sudden accelerations, and erratic turns burn through battery life twice as fast. If your drone is constantly making corrections, your flight time drops dramatically.
- Avoid full-throttle takeoffs. Quick bursts of speed drain power faster than steady climbs.
- Use gentle stick movements. Fast, jerky inputs force the motors to work harder.
- Minimize sharp turns and sudden stops. Smooth, controlled movements use less energy.
- Glide when possible. Instead of full acceleration, let momentum do some of the work.
Every extra minute in the air gives you more shots. Stop wasting time on unnecessary movements.
Optimize Speed for Stable Shots
Faster doesn’t mean better. In fact, flying too fast hurts your footage and drains your battery.
- Drones flying at max speed use 40% more power than when cruising at moderate speeds.
- Slower speeds = smoother footage. If you’re recording video, high-speed flying creates shaky shots.
- Hovering too long kills battery. If you’re not actively filming or framing a shot, keep moving.
Find the balance between speed and stability. Too slow, and you waste time. Too fast, and you waste battery. Cruising at a steady, moderate pace keeps your shots smooth and extends flight time.
Use Return-to-Home (RTH) Wisely
Return-to-Home (RTH) isn’t just a failsafe—it’s a battery-saving tool.
But if you set it up wrong, it can drain even more power than flying manually.
Fix these mistakes:
- Set the right altitude. Too high, and your drone wastes energy climbing before coming back. Too low, and it risks hitting obstacles. Find a safe but efficient altitude.
- Manually return before hitting low battery warnings. Don’t wait for the auto RTH to kick in—by then, you’re cutting it too close.
- Keep an eye on wind conditions. A headwind forces your drone to work harder on the return trip. Plan accordingly.
RTH is a lifesaver when used correctly. But if you let your drone fly too far without thinking ahead, it might not make it back.
Fly in Good Conditions: Wind and Temperature Matter
Bad weather isn’t just a safety issue—it’s a battery killer.
- Cold weather (below 50°F/10°C) reduces battery life by 30% or more. If you’re flying in winter, pre-warm your batteries before takeoff.
- Strong winds drain power. Your drone fights to stay stable, using way more energy than normal.
- Extreme heat can cause battery swelling. If your drone overheats, it could shut down mid-air.
Fly in calm, moderate conditions whenever possible. If you have to fly in the cold, keep spare batteries in an insulated bag to keep them warm.
Use Smart Battery Features
Most drones track battery health—but many pilots ignore it.
- Check battery cycles. Most lithium drone batteries last 200–300 charge cycles before degrading. If yours is close, expect shorter flights.
- Look for signs of swelling. A swollen battery is dangerous and should never be used.
- Store batteries at 50% charge when not in use. Fully charged or fully depleted batteries degrade faster over time.
Take care of your batteries, and they’ll take care of your flights.
Advanced Drone Photography Techniques
Long Exposure and Night Drone Photography
Most drones struggle at night. The images turn out noisy, blurry, or completely unusable.
That’s because conventional drone cameras aren’t built for low light. Small sensors, fixed apertures, and automatic settings work against you. You just need the right techniques, the right settings, and the right gear.
ND Filters: The Key to Long Exposures
Long exposure shots capture movement over time. This works for light trails, smooth water, and starry skies—but only if you control the light.
Neutral Density (ND) filters reduce the amount of light entering the sensor, allowing longer shutter speeds without overexposure. The brighter the scene, the stronger the ND filter you need.
Shutter Speed: Freezing vs. Blurring Motion
For long exposure drone shots, start with these settings:
- 1/30s to 1/60s – Keeps the image bright but doesn’t create much motion blur.
- 1 to 5 seconds – Best for light trails and smooth water.
- 5 to 10 seconds – Great for star trails and cityscapes with heavy movement.
- 10+ seconds – Only works if your drone is perfectly still (which is rare).
Most consumer drones can’t hold position for more than a few seconds without drifting. That’s why keeping exposures under five seconds is best.
Using Hyperlight Mode on DJI Drones
Some DJI drones have Hyperlight Mode, which is designed for low-light shooting.
Instead of one long exposure, it takes multiple short-exposure images and combines them into a cleaner, brighter photo.
It works best for:
- City lights and urban nightscapes
- Low-light landscapes without much movement
- Reducing noise while keeping details sharp
If your drone has Hyperlight Mode, use it when shooting handheld-style night shots where long exposure isn’t possible.

Keeping the Drone Steady for Long Exposures
A tripod keeps a normal camera stable. But a drone is fighting gravity, wind, and GPS drift.
Even in “hover mode,” drones move slightly, making long exposures tricky.
Here’s how to stabilize your drone at night:
- Fly in low or no-wind conditions. Higher levels causes shaking and drift.
- Use Tripod Mode (if available). Slows movement and makes adjustments smoother.
- Shoot in RAW format. Gives more control over brightness and noise reduction.
- Use manual focus. Autofocus struggles in low light. Set focus to infinity (∞) manually.
Night drone photography is tough. But with ND filters, the right shutter speed, and proper stabilization, you can capture stunning long exposure shots.
If your images look blurry or noisy, your shutter is too slow, or your drone isn’t stable enough. Adjust settings, use shorter exposures, and let your drone do the work while you control the details.
Panoramic and Vertical Pano Shots
A single frame doesn’t always capture the full story. Sometimes, you need more width, more height, or a full 360-degree view.
That’s where panoramic drone shots come in.
Most drones crop out the best parts of a wide scene. A pano shot fixes that by stitching multiple images together, creating an ultra-wide, high-resolution masterpiece.
But not all panoramic shots are the same.

Multi-Frame Aerial Panoramas: Go Wider Without Losing Detail
Aerial panoramas let you capture entire cities, vast landscapes, or dramatic cloud formations in a single image.
Instead of relying on a wide-angle lens that distorts edges, your drone takes multiple overlapping shots, which you later stitch together.
To do this manually:
- Switch to manual mode. Auto settings can change exposure between shots, ruining the final pano.
- Tilt the camera slightly downward. Avoid too much sky—it wastes pixels.
- Fly slowly from left to right, overlapping each frame by 30-50%.
- Shoot in RAW. You’ll need that extra data for blending later.
- Use software like Adobe Lightroom or PTGui to stitch the images.
Some drones, have an automatic panorama mode, but manual stitching gives you more control over alignment and exposure.
Vertical Pano Mode: More Sky, Less Distortion
Instagram loves vertical images. A single shot often crops too much, cutting out the sky or foreground.
Vertical pano mode solves that. Your drone tilts the camera, takes multiple stacked images, and merges them into a tall, high-resolution frame.
Perfect for:
- Mountains and cliffs – Capture the full height without distortion.
- Tall buildings and skyscrapers – Show scale without losing details.
- Forest canopies – More trees, less sky, better balance.
If your drone doesn’t have Vertical Pano mode, you can still create one manually:
- Take three shots—one straight, one slightly tilted down, one slightly up.
- Keep exposure settings the same for all three images.
- Stitch them together in Lightroom or Photoshop.
360-Degree Aerial Photos: Total Immersion
A full 360-degree image lets the viewer control the perspective. This is ideal for VR, real estate, or interactive maps.
Most drones with a Sphere Mode take 26 photos in all directions, then auto-stitch them into a seamless image.
If your drone doesn’t have Sphere Mode, you can do it manually:
- Shoot in a grid pattern—multiple rows, multiple angles.
- Use a third-party app like PTGui, AutoPano, or Photoshop to merge them.
- Export in an equirectangular format for VR and 360-degree viewers.
Panoramic shots give you more detail, more sky, and more impact.
Go wide with multi-frame stitching. Go tall with vertical panos. Go immersive with full 360-degree photos.
Most drone photographers never explore these options. That’s why their shots look like everyone else’s.
Yours don’t have to.
Best Practices for Capturing Aerial Landscapes
Lighting, contrast, and composition separate breathtaking shots from forgettable ones. The difference between a dull image and a stunning one comes down to timing, shadows, and color balance.
Golden Hour vs. Midday Shooting: The Light Makes or Breaks Your Shot
Golden hour—the first and last hour of sunlight—creates the most dramatic, natural lighting for aerial shots.
Why?
- Softer shadows – No harsh midday contrast. More depth, more texture.
- Richer colors – The warm glow makes skies and landscapes pop.
- Less glare – Midday sun washes out colors and creates unwanted reflections.
Midday shooting is brutal. The sun is high, shadows disappear, and everything easily look flat. If you must shoot at noon, use ND filters to balance exposure and reduce glare.

Adjusting Contrast and Saturation for Dramatic Skies
A drone can capture massive skies—but without the right adjustments, they can look dull.
Here’s how to make your sky stand out:
- Increase contrast – Separates clouds from the background, making them more defined.
- Boost saturation carefully – Overdoing it makes skies look fake. Stick to a 10-15% increase.
- Use the dehaze tool – Removes atmospheric haze and sharpens distant elements.
Clouds add depth and character. If the sky looks empty, adjust exposure to make details pop.
Using Shadows Creatively in Aerial Photography
Shadows add texture, drama, and depth to drone shots. Without them, your image can feel flat and lifeless.
Best ways to use shadows:
- Shoot at low angles – Sunrise and sunset create long, dramatic shadows.
- Use natural patterns – Trees, mountains, and buildings cast striking shapes.
- Experiment with silhouettes – A high-contrast shadow shot can be more interesting than the subject itself.
Shadows tell a story. If you ignore them, you’re missing half the scene.
Post-Processing and Editing Drone Photos
Essential Editing Software for Drone Photography
Not all editing software is made for drone photography. Some tools work better for large landscapes, high dynamic range (HDR), and lens corrections.
Adobe Lightroom vs. Photoshop vs. Luminar: Which One Should You Use?
Here’s how the main three stack up:
Adobe Lightroom: The Industry Standard for Photo Editing
Lightroom is built for photographers. It’s clean, powerful, and great for batch editing.
- RAW editing – Pulls out maximum detail from your drone shots.
- Color grading – Adjust hues, saturation, and contrast to make skies pop.
- Batch processing – Apply the same edits to multiple images in seconds.
- Lens corrections – Fixes warping from wide-angle drone cameras.
If you edit a lot of drone photos, Lightroom is the best choice. It’s fast, reliable, and trusted by professionals.
Photoshop: Advanced Editing and Retouching
Photoshop is for heavy-duty editing. If your shot needs serious adjustments, this is the tool.
- Sky replacement – Swap dull skies for dramatic clouds.
- Object removal – Erase unwanted elements, like power lines or people.
- Compositing – Blend multiple shots together for surreal effects.
- Precision retouching – Fix exposure, shadows, or overexposed areas manually.
Photoshop is overkill for minor edits. But if you want total control, it’s worth it.
Luminar: AI-Powered Editing for Quick Fixes
Luminar is for fast, one-click edits. It’s perfect if you don’t want to spend hours adjusting settings.
- AI-powered sky enhancement – Automatically boosts sky details.
- One-click HDR effects – Makes dull shots look dramatic.
- Automatic object removal – Cleans up noise and distractions.
It’s not as precise as Lightroom or Photoshop. But if you want quick results, it works.
Batch Editing: Save Time, Keep Consistency
Editing one photo at a time takes up loads of time. Batch editing lets you apply the same adjustments across multiple images, saving hours of work.
- In Lightroom: Create a preset and apply it to an entire set of photos.
- In Photoshop: Use Actions to automate repetitive edits.
- In Luminar: AI-enhancements can be applied to multiple shots instantly.
Batch processing keeps your edits consistent—so your drone shots look like they belong in the same series.
Eliminating Fisheye Distortion: Fix Warped Horizons
Most drone cameras have a wide-angle lens. That’s great for capturing large scenes but terrible for straight lines.
Fisheye distortion bends your horizon and warps objects at the edges. If you don’t fix it, your shots look unnatural.
Here’s how to correct it:
- Lightroom: Use the Lens Correction tool and adjust the distortion slider.
- Photoshop: Use Adaptive Wide Angle to straighten the image.
- Luminar: Apply automatic lens correction to remove warping.
Aerial shots should look natural. If the horizon is curved, your viewers will notice—and not in a good way.
Correcting White Balance and Exposure
A great drone shot can still look terrible if the colors are off.
Too blue? It looks cold and unnatural.
Too yellow? It looks like it was shot through a dirty window.
White balance controls color temperature. Exposure controls brightness. If you get either wrong, your photo won’t look real.
Stop Using Auto White Balance (AWB): It’s Ruining Your Colors
Auto White Balance (AWB) isn’t reliable. It changes mid-flight based on lighting, leaving you with inconsistent colors across your shots.
Set it manually instead as mentioned earlier (e.g. Daylight (5600K) – Best for bright, sunny conditions, Cloudy (6000K-6500K) – Adds warmth to dull, overcast skies.)
If your image looks too warm (orange/yellow), lower the Kelvin value. If it looks too cool (blue/green), raise it.
A calibrated white balance means less time fixing colors in post-production.
RAW Files: Recover Highlights and Shadows
If you shoot JPEG, you’re already losing.
Since JPEG files are compressed, you can’t recover lost details in bright or dark areas.
RAW files store all the data. That means:
- You can fix overexposed clouds without losing texture.
- You can brighten dark shadows without adding noise.
- You have way more flexibility in post-processing.
Fixing Exposure: Stop Overexposing the Sky
A drone camera struggles with bright skies and dark ground. If you expose for the landscape, the sky is blown out. If you expose for the sky, the ground is too dark.
To fix this:
- Use the Histogram – If it’s spiking on the right, your shot is overexposed.
- Turn on Zebra Stripes – These highlight overexposed areas so you can adjust before shooting.
- Drop exposure by -0.3 to -0.7 EV – Slight underexposure protects highlights.
- Use ND Filters – They reduce brightness without messing with settings.
Auto settings will fail you. Set white balance manually. Shoot RAW. Use histograms to protect highlights and shadows.
Enhancing Drone Photos with Color Grading
A drone captures the scene, not the mood.
That’s your job. Done right, color grading changes the entire feel of your image.
HSL: Total Control Over Individual Colors
Most beginners edit colors the wrong way—they crank up the saturation slider and hope for the best.
That never works.
HSL (Hue, Saturation, Luminance) lets you adjust colors separately, instead of applying changes across the entire image.
- Hue – Changes the actual color. Want a teal sky instead of blue? Adjust the hue.
- Saturation – Controls how intense a color appears. Boost greens for a tropical look, or desaturate them for a muted, moody feel.
- Luminance – Adjusts brightness. Darken the blues to make the sky pop, or brighten greens for a softer look.
Example: If your greens look too neon, reduce the green saturation and slightly adjust the hue toward yellow. If your sky is too bright, lower the blue luminance to add depth.
Split Toning: Adding Cinematic Tones
Split toning controls the color of your highlights and shadows separately.
Why does that matter?
Because most images have natural color contrast. The sky tends to be cool (blue tones), while the ground is warm (yellows, oranges). Split toning lets you exaggerate that contrast for a cinematic feel.
- Warm highlights + cool shadows = Hollywood-style grading.
- Cool highlights + warm shadows = a moody, dramatic look.
- Monochrome split toning = desaturated but stylish.
If your image feels lifeless, play with split toning. A slight color shift in highlights and shadows makes a huge difference.
The “Teal and Orange” Look: Why It Works
Ever notice that most blockbuster movies use teal and orange tones? That’s not random.
Teal and orange are complementary colors—they sit opposite each other on the color wheel. This contrast makes subjects pop.
Drones naturally capture a lot of blue (sky) and orange (sunlight, ground, buildings), making this one of the easiest and most effective color grades.
To achieve it:
- Lower blue luminance to make the sky deeper.
- Shift orange and yellow hues slightly toward red.
- Increase contrast to separate tones more clearly.
HDR Merging and Blending Techniques
Drones struggle with bright skies and dark shadows. One-click exposure settings won’t fix it.
That’s why HDR merging exists. It balances highlights, midtones, and shadows by combining multiple exposures into one perfect shot.
If your drone has Auto-Exposure Bracketing (AEB) and you’re not using it, you’re wasting dynamic range.
What is HDR Merging?
HDR (High Dynamic Range) merging blends multiple photos at different exposures into one final image. This prevents:
- Overexposed skies – You keep detail in the clouds.
- Crushed shadows – Dark areas stay visible.
- Flat images – You get a balanced, realistic look.
Without HDR, drone shots often lose details in bright or dark areas. With HDR, you recover everything.
Using Auto-Exposure Bracketing (AEB) for HDR Shots
AEB automates the HDR process. Instead of taking one photo, your drone takes three to five shots at different exposure levels.
- Underexposed (-2 EV) – Captures bright areas (sky, clouds).
- Neutral (0 EV) – Keeps midtones balanced.
- Overexposed (+2 EV) – Brightens shadows without noise.
Most drones, like the DJI Mavic 3, have AEB settings for 3, 5, or 7 shots.
For best results:
- Set AEB to 5 shots. Three might not be enough, and seven can be overkill.
- Shoot in RAW. JPEG compresses details, limiting recovery options.
- Use a tripod mode or hover steadily. Movement ruins HDR blending.
AEB gives you the data. Then you go into post-processing.

Merging HDR in Lightroom: Step-by-Step
Once you have your bracketed shots, it’s time to merge them into one HDR image.
- Import the RAW files into Lightroom.
- Select all bracketed exposures.
- Right-click > Photo Merge > HDR.
- Enable Auto Align (important if your drone moved slightly).
- Keep Deghosting Low (prevents artifacts in moving clouds or water).
- Click Merge and adjust final exposure, contrast, and colors.
Lightroom does most of the work automatically, but tweaking the final exposure makes it stand out.
Avoiding the “Overdone HDR Look”
Bad HDR looks fake and cartoonish. If your shot has unnatural halos, glowing edges, or weird colors, you overdid it.
Fix it by:
- Lowering clarity – Too much makes images look gritty.
- Avoiding extreme contrast – Balance highlights and shadows naturally.
- Not oversaturating colors – Realistic tones look better than neon skies.
HDR merging saves details you’d otherwise lose. Use AEB for properly exposed skies and shadows. Merge in Lightroom for natural balance. Avoid overprocessing so your images look professional, not artificial.
Removing Distractions and Enhancing Details
A great drone shot can still be ruined by small distractions.
Power lines. Random people. A car in the wrong place. Even the tiniest details pull attention away from your subject.
Your job isn’t just to capture the scene. It’s to control what the viewer sees.
Using the Patch Tool in Photoshop
Photoshop’s Patch Tool is one of the easiest ways to remove distractions. Unlike the clone stamp, it blends textures automatically, making edits look natural.
Here’s how to use it:
- Open your image in Photoshop.
- Select the Patch Tool (Shortcut: J).
- Draw around the object you want to remove.
- Drag the selection to a clean area. Photoshop will blend it automatically.
- Adjust as needed with the Spot Healing Brush for final touches.
It works best for small distractions like rocks, birds, or light poles. If you’re removing something bigger, use Content-Aware Fill for a cleaner edit.
![Remove Objects with the Patch Tool in Photoshop [Complete Guide]](https://abjacademy.global/wp-content/plugins/wp-youtube-lyte/lyteCache.php?origThumbUrl=https%3A%2F%2Fi.ytimg.com%2Fvi%2FkHpBgDsizNA%2F0.jpg)
Sky Replacement for a Dramatic Effect
Not every sky is worth keeping. A washed-out, dull sky can make even the best landscape feel lifeless.
Photoshop’s Sky Replacement Tool lets you swap out boring skies for something more dynamic.
- Go to Edit > Sky Replacement.
- Choose from Photoshop’s preset skies or upload your own.
- Adjust brightness, temperature, and blending sliders.
- Refine the mask if needed.
For the most realistic results, match the new sky’s lighting and color temperature with the foreground. A sunset sky won’t work with a bright midday landscape.

Dodging and Burning: Bringing Out the Right Details
Dodging and burning control light and shadow—the foundation of depth in any image.
- Dodge (Lighten) – Highlights important details, like clouds or mountain peaks.
- Burn (Darken) – Adds depth by emphasizing shadows and contours.
In Photoshop:
- Select the Dodge or Burn tool.
- Set Exposure to 5-10% for subtle effects.
- Gently brush over highlights (dodge) or shadows (burn).
A small touch can make textures pop without over-processing.
Drone Photography and Industry Applications
Drones are not just for photography and fun flights. They’re changing major industries, saving time, cutting costs, and capturing data humans simply can’t.
How Drones Are Transforming Different Fields
Real Estate Marketing: Sell Homes Faster with Aerial Footage
Aerial shots sell properties. Listings with drone photography get 68% more views than those without.
Why?
Because a drone shows more than just the house. It captures:
- The entire property layout—backyards, pools, driveways, and land size.
- Neighborhood surroundings—parks, schools, amenities, and nearby attractions.
- Unique angles—front-facing, overhead, and sweeping cinematic flyovers.
A 30-second drone video adds thousands in perceived value. Buyers aren’t just looking for a home—they want the full picture.
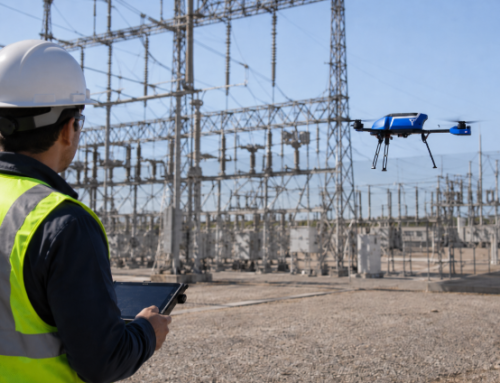
Aerial Mapping and Surveying: Faster, Cheaper, and More Accurate
Traditional land surveys take weeks. Drones do it in hours.
Aerial mapping with drones provides:
- 3D terrain models – Helps engineers and developers plan construction projects.
- Precision land measurements – Reduces errors in site planning and resource allocation.
- Time-lapse progress tracking – Monitors large-scale projects without expensive helicopter flyovers.

Wildlife Conservation: Protecting Endangered Species from Above
Scientists and conservationists use drones to monitor animals in ways that weren’t possible before.
- Elephant and rhino tracking – Reduces the need for risky on-foot monitoring.
- Anti-poaching surveillance – Covers vast areas where rangers can’t patrol 24/7.
- Forest and habitat analysis – Detects illegal deforestation and environmental damage.
Make Money With onetizing Drone Photography
If your footage looks professional, people will pay for it.
The question is: How do you turn your drone photography into a business?
Selling Stock Drone Photos and Videos
Stock footage sells every single day. Companies, ad agencies, and social media creators are always looking for high-quality aerial shots.
And they’re willing to pay.
Here’s how much you can make:
- Stock photos sell for $5 to $50 each on platforms like Shutterstock.
- Stock videos go for $50 to $500 per clip on sites like Pond5.
- Exclusive footage earns even more—some buyers pay thousands for rare shots.
The best-selling stock drone footage includes:
- City skylines at sunrise or sunset.
- Coastlines and tropical beaches.
- Cinematic aerial landscapes with mist or dramatic lighting.
- Slow-moving shots of mountains, rivers, and forests.
Pro tip: Shoot in 4K or higher. Buyers always want the highest resolution possible.
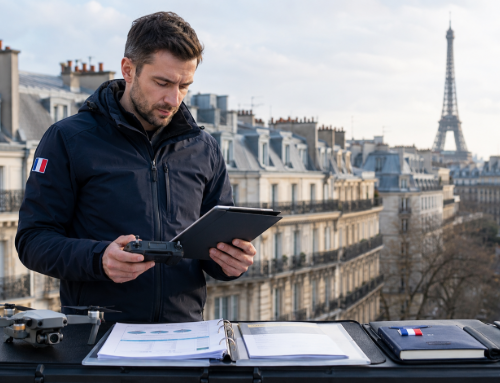
Becoming a Certified Drone Photographer for Commercial Projects
If you want serious clients, you need to go beyond casual flying.
That means getting certified.
- In the U.S., you need a Part 107 license from the FAA to fly commercially.
- In the U.K., commercial pilots need a GVC (General Visual Line of Sight Certificate).
- Other countries have specific drone regulations—check your local laws.
Once you’re certified, you can work on:
- Construction and real estate projects.
- Commercial brand shoots and marketing campaigns.
- Agricultural and environmental surveys.
Companies don’t hire uncertified pilots. Get the paperwork, and you’re already ahead of most drone owners.
Take the Part 107 Preparatory Online Course
Offering Drone Photography Services for Events and Tourism
Events need aerial coverage. And they’ll pay top dollar for it.
- Weddings – Couples pay $500 to $3,000 for drone shots of their big day.
- Resorts & Hotels – Luxury locations hire drone photographers to promote their properties.
- Travel & Tourism – Tour companies need cinematic aerial footage to attract visitors.
The key to charging higher rates? Offer edited, polished footage—not just raw clips.
A well-edited 60-second video can be worth more than 100 raw photos.
Trends in Drone Technology
New features are redefining what drones can do. AI tracking, obstacle avoidance and autonomous flight, and FPV racing are pushing the limits. If you’re not paying attention, you’re falling behind.
AI-Powered Object Tracking: Your Drone, Your Cameraman
AI-powered drones can track, follow, and frame shots automatically.
DJI drones like the Air 3 and Mavic 3 use ActiveTrack, an AI-driven system that:
- Locks onto moving subjects—cars, people, animals.
- Predicts movement—adapts to sudden changes in direction.
- Avoids obstacles mid-flight—adjusts course without losing the subject.
Photographers can now focus on creativity instead of controlling the drone. That’s a huge shift.

Obstacle Avoidance
Obstacle avoidance has improved massively. Drones can fly through dense forests without crashing. The use cameras to map their surroundings in real time.
Why does this matter?
- More safety – No more sudden crashes.
- Better shots – Drones can fly complex routes without human error.
- Easier operation – Even beginners can get professional-looking footage.

The Rise of FPV Drones: Speed, Control, and Immersion
First-Person View (FPV) drones are taking over. They offer:
- Cinematic movement – Fly low, fast, and smoothly through tight spaces.
- Complete control – Pilots see what the drone sees in real time.
- Adrenaline-fueled flying – FPV drones hit speeds of over 100 mph.
The DJI Avata line and custom FPV builds have changed aerial videography. Action sports, real estate fly-throughs, and creative shots now use FPV instead of traditional drones.

Take Your Drone Photography to the Next Level
A drone is only as good as the person flying it.
You now know how to frame shots, adjust settings, and edit like a pro. No more flat images. No more blown-out skies. No more shaky footage.
The best drone photographers don’t settle for auto mode. They control composition, exposure, and motion. They shoot RAW, use ND filters, and take advantage of golden hour light.
Experiment. Try new angles. Fly lower than usual. Capture shadows and reflections. Shoot in bad weather. Make mistakes, then learn from them.
Most drone pilots never push past the basics. That’s why their shots look like everyone else’s.
Don’t let that be you.
Go out and shoot something that makes people stop scrolling.