

Drones have become the de facto tool of choice for aerial footage – from shooting those action-packed scenes in films, realtors taking buyers on property tours showcasing the full grandeur of the area from unique angles, all through to researchers putting together nature documentaries. Over the past decade, drones have become much more affordable and accessible, allowing both professionals and hobbyists to explore new creative possibilities without the hefty price tag of traditional aerial equipment like helicopters. Movie studios get to acquire dynamic shots while saving on production cost, Youtubers get to enrich the material they create for their fans, corporate promo videos can now be done in a fraction of the time they used to take – the power of drone videography cuts across the board. However, achieving smooth, cinematic footage is not cakewalk. It requires both technical knowledge and a creative eye. We will break this all down in this guide.
Drone Equipment for Videography: What You Need
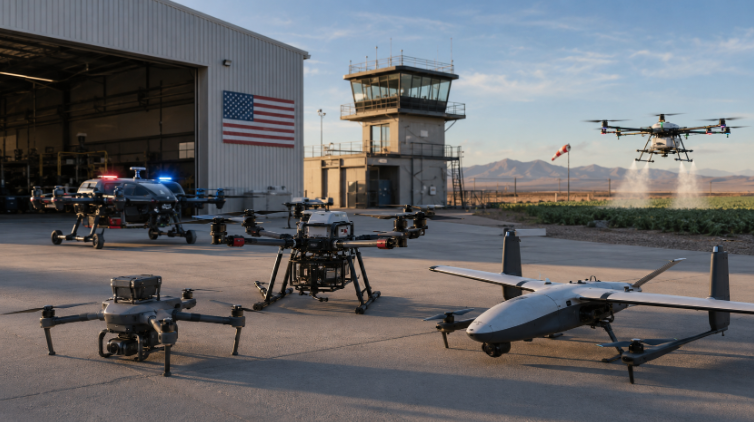
Choosing the Right Drone
First is the UAV itself. The model you go with will affect the quality of your footage as well as your overall flying experience. Here’s what to consider for the best drone for videography:
1. Flight Time
How long can it remain airborne? Look for drones with longer flight times, ideally 20 minutes or more per battery. You have the likes of DJI Mini 4 Pro offering up to 34 minutes of flight time, while more advanced models like the DJI Air 3 going up to 46 minutes. Autel’s long range Evo II Dual 640T V3 gives you 38 minutes. Keep in mind that wind and the weight of accessories, like additional cameras for drones that support more payloads.
2. Range and Coverage
This looks at the distance your drone can fly from you while maintaining a stable connection. When working in wide-open spaces or for cinematic shots, a drone with a longer range is preferable. Drones like the DJI Air 3 and the DJI Matrice 600 Pro offer ranges of up to 20 km (12.4 miles) and 5 km (3.1 miles), respectively.
3. Camera Capabilities
Higher resolution cameras may be overkill for casual Tiktoks, but if you’re working on film or corporate advert, you’ll need every pixel-advantage you can get. On the other hand, hobbyists and those working on small scale projects don’t need to break the bank.
- 4K Cameras: They are the standard for consumer drone videography, including social media content, real estate listings, and YouTube videos. You get 4K video with the likes of DJI Air 3 and DJI Mini 4 Pro, recording at 60fps and HDR.
- 6K Cameras: There’s extra detail here, making them a great choice for filmmakers or professionals working on larger projects. In such cases more resolution is needed especially for post-production processing without losing image quality. A popular drone in this category is the Autel EVO II Pro 6K which also includes 16x digital zoom.
- 8K Cameras: If you’re working on a high-end film production or require peak resolutions, 8K cameras are your go-to. They capture immense detail and allow for extensive editing flexibility, especially for cinematic productions or large-scale broadcasts, as is the case with DJI Inspire 3, which supports up to 8K video with its full-frame imaging system.
Enterprise drones like the DJI Matrice 350 are designed to carry payloads like the Zenmuse series, and you have more room to choose the ideal camera based on the project scope. Ensure you do not exceed the payload weight limit though.
4. Stability and Gimbal Systems
When you’re filming with a handheld camera, you usually rely on a stabilizer or tripod to keep things smooth. A gimbal does the same for drones. It helps absorb any bumps or fast movements, like when the drone faces wind or makes sharp turns. Without it, your footage can turn out shaky, which makes it look amateurish and hard to watch.
The two most common gimbals are 2-axis and 3-axis. A 2-axis gimbal stabilizes the camera’s tilt and roll, while a 3-axis gimbal adds an extra layer of stabilization by controlling the yaw, or the left and right rotation. The more axes a gimbal controls, the smoother and more polished your footage will be.
Additional Accessories
The role of these ranges from improving the quality of your footage to ensuring that your drone is always ready for action. They include:
- ND (Neutral Density) filters
ND filters work just like sunglasses for your drone’s camera, reducing the amount of light that enters the lens. That’s important when you’re shooting in bright sunlight or capturing long-exposure shots like light trails. They allow you to adjust the shutter speed for cinematic effects while maintaining proper exposure levels.
- Storage Cards
The amount of footage you capture during a drone flight can add up quickly, especially if you’re recording in high-resolution formats. MicroSD cards are vital here. Look for cards with high write speeds to handle the data-intensive video files. Investing in high-capacity storage cards (64GB or higher) ensures you have enough room for extended flights without the risk of running out of storage mid-shoot.
-
Remote Controllers
While your drone’s app provides a basic interface, a remote amps up you capacity. Many premium drones come with customizable remotes that let you adjust settings on the spot and control your drone more smoothly. Brands like DJI and Autel offer Smart Controllers with built-in screens, so you don’t need to attach your phone for better outdoor visibility.
If you’re after a more immersive experience, FPV (First-Person View) goggles let you see exactly what your drone sees in real time, giving you a cockpit-like perspective for a more dynamic flight.
-
Safety Equipment
Protect your gear and ensure the safety of others by investing in propeller guards to prevent damage to your drone’s blades if it bumps into something, and landing gear to ensure your drone can lands safely, even on rough or uneven surfaces.
Software Tools
Flight Control Apps
When controlling your drone, the most popular software tools are the ones that come directly from the drone manufacturers. For example, DJI Fly provides everything from real-time video streaming to intelligent flight modes. There’s also DJI Go 4, which is packed with features like automatic flight logs, and live HD view, making it a great tool for both beginners and more advanced pilots.
For those looking for a bit more customization, apps like Litchi offer advanced features like waypoint missions, which allow you to plan your drone’s flight path ahead of time.
Post-Processing Software
Once you’ve captured your footage, it’s time to work on the edits. Tools like Adobe Premiere Pro, Final Cut Pro, and DaVinci Resolve give you all the options you need to trim, cut, and add effects. They also let you fine-tune color grading and stabilization to make sure your shots look sharp and smooth. Want to add some custom sound? Programs like Adobe Audition and Audacity are great for creating the perfect soundtrack or adding sound effects that match your drone footage. Scroll below for more detail and software competitors.
Preparing to Shoot Drone Videos
Pre-flight Checklist
Related reading: Key FAA Drone Regulations Every U.S. Pilot Should Know
Aesthetic and Practical Considerations
This one depends on the actual content that you want for the drone video. Urban rooftops, mountain ranges, beaches, forests, and historical sites are just a couple of locations can give you some pretty unique perspectives. However, some might be difficult to access or might require permits. Also consider how the area will impact your drone’s performance. For example, dense forests or areas with lots of tall buildings can cause GPS interference, which is why it is easier to work in open spaces with clear sightlines.
Safety Considerations
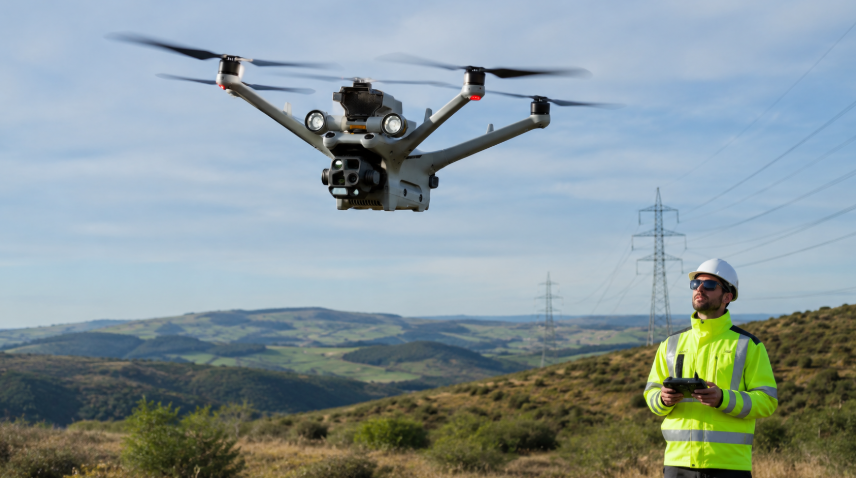
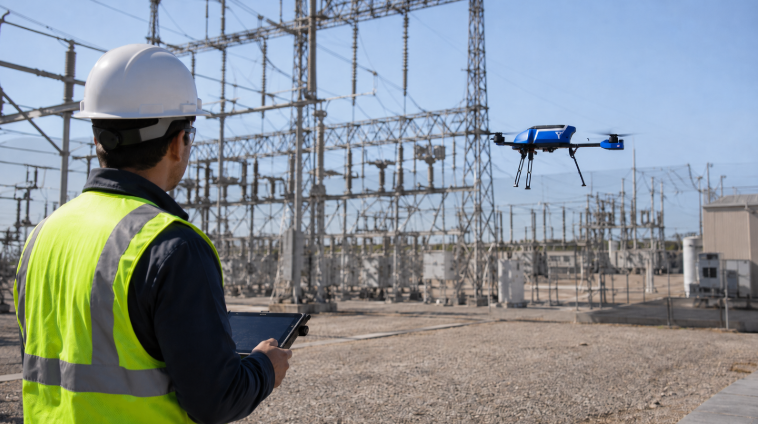
- Keep a Safe Distance from Crowds and Power Lines
Crowds can be unpredictable, and flying too close to them can lead to accidents. You also don’t want your drone getting tangled in power lines. Always maintain a safe distance from these hazards and avoid flying over busy areas whenever possible.
- Have Emergency Procedures in Place
Even with the best preparation, things can go wrong. Your drone could lose GPS signal. Hardware may malfunction. Do you have a plan for such situations? For instance, in case of GPS loss or a drone flyaway, most drones have a “return to home” (RTH) feature that can guide them back to the starting point.
- Always Have a Spotter
Get an extra set of eyes to help you monitor the drone’s surroundings and warn you of any potential hazards, especially when filming in busy or complex environments.
Filming Techniques and Best Practices for Drone Videography
Stabilizing Your Shots
Shaky footage can make even the most stunning landscapes look chaotic, which is far from the cinematic effect you’re aiming for. However, stabilizing your drone shots doesn’t have to be difficult:
Use Slow, Deliberate Movements
Jerky, fast movements create unwanted motion, making the video appear unstable. Instead, focus on performing gentle, controlled maneuvers such as slow panning or gradual rises and descents. This has the welcome benefit of giving your footage a more cinematic, fluid feel.
If you’re just getting started, begin by practicing simple moves like straight-line flights or smooth orbits around a subject. These basic moves allow you to concentrate on the control of your drone without worrying about complex camera angles or techniques.
Work with Controlled Orbits
Orbiting is one of the most visually intense drone maneuvers, but it’s also tricky to pull off correctly. For a smooth orbit, rotate your drone around a point of interest (POI) while maintaining a consistent altitude. Use both the yaw (for rotation) and roll (to keep the orbit steady) controls. It takes some time to get used to, but once you have the hang of it it’s a great tool for stabilizing your footage while capturing dynamic, 360-degree shots.
Adjust Your Drone’s Sensitivity
Many drones offer customizable sensitivity settings for control sticks, which allow you to adjust how responsive your drone is to your inputs. By lowering the sensitivity, you make it easier to execute smooth, gradual movements, especially when flying at lower speeds. This helps eliminate jerky motions that can occur when you accidentally make quick, hard inputs. Take some time to experiment with these settings to find the right balance for your flying style
Gimbal Factor
A good gimbal can compensate for small movements and vibrations, ensuring that your camera remains steady even when the drone is moving. However, even with a gimbal, the way you control your drone in the air makes a big difference. Make sure your gimbal is properly balanced before each flight, and be mindful of the drone’s position as you fly.
Shots in Calm Conditions
As wind can cause your drone to drift or shake, you’re better of flying on calm days when possible. If you’re flying in gusty conditions, be prepared to make quick adjustments and expect less stability in your shots. In such cases, keep your movements simple and focus on precision.
Choosing the Right Camera Settings for Drone Videography
These directly affect the visuals you obtain. Here’s how you tune them:
ISO: Control Light Sensitivity
ISO determines how sensitive your camera is to light. In bright sunlight, keep your ISO low (around 100 or 200) to maintain clarity and avoid grainy footage. However, in low-light conditions, such as during dawn or dusk, you may need to increase your ISO to around 800 or even higher to maintain exposure. But be cautious—higher ISO values can introduce noise into your footage, so aim for the lowest possible setting while maintaining good exposure.
Shutter Speed: Freeze Action or Add Motion Blur
Shutter speed controls how long the camera’s sensor is exposed to light. For cinematic footage, a common rule of thumb is to set your shutter speed to double your frame rate (for example, if you’re shooting at 24fps, set your shutter speed to 1/50). This helps achieve that smooth, natural motion blur in your videos. If you’re filming fast-moving subjects or want to freeze the action (think sports or fast drones), opt for a faster shutter speed—something like 1/1000 will do the trick.
Aperture: Control Depth of Field
Aperture refers to the size of the lens opening that lets light in. A lower aperture value (such as f/2.8) results in a brighter image with a shallow depth of field—great for isolating your subject against a blurred background. A higher aperture (like f/11) darkens the image but brings more of the scene into focus. Depending on the style you’re going for, adjusting the aperture can dramatically change the look of your footage. For sweeping landscapes, a higher f-stop will help maintain sharpness throughout the frame.
White Balance: Keep Colors True
White balance affects how colors appear in your footage. A poorly set white balance can cause unnatural color shifts, making your video look off. It’s best to avoid using the automatic white balance setting, as it can change throughout your shot, leading to inconsistencies. Instead, set your white balance manually. For most outdoor shoots, setting it to ‘Sunny’ or ‘Cloudy’ will give you natural, warm tones. Remember, you can always tweak this further during post-production, but it’s good practice to get it right while shooting to save time later.
ND Filters: Exposure Control
Use the Neutral Density filters to reduce the amount of light hitting the sensor, allowing you to maintain a cinematic shutter speed while avoiding overexposure. If you’re shooting in bright daylight, an ND filter helps keep your footage crisp and smooth, especially when flying fast or filming high-speed action.
Frame Rate: Smooth vs. Slow Motion
The frame rate you choose can dramatically alter the feel of your video. A frame rate of 24fps is standard for most cinematic footage, giving your video that smooth, filmic look. If you’re aiming for slow-motion shots, consider filming at 60fps or higher. You can always slow down the footage in post-production to add that dreamy, slow-motion effect. High frame rates are especially useful in action shots, like capturing a drone zooming over a moving car or a person running through a landscape.
Learn about all this and more in ABJ Academy’s Drone Videography Training Course
Composition Tips for Drone Videos
The beauty of using drones for filming is that you can experiment with different angles, heights, and perspectives that were once difficult to achieve. However, how you frame your shot plays a massive role in how the viewer experiences your footage. Here are a few foundational principles of visual composition.
1. The Rule of Thirds
The rule of thirds is one of the most basic yet powerful principles in photography and videography. Say your frame is divided into nine equal parts by two horizontal and two vertical lines. Now, the key elements in your shot should be placed along these lines or at their intersections. This technique helps create balance and draws the viewer’s eye naturally to the subject.
In drone videography, this can work wonders. For example, you could position a landmark or person along the lower third of the frame, leaving space in the sky or ground. This not only makes the shot feel more dynamic, but it also allows for a balanced distribution of elements like the sky, land, or water.
2. Leading Lines
These are lines—either natural or man-made—that direct the viewer’s eye toward the main subject or point of interest in your frame. They are used to guide the viewer’s gaze. Roads, rivers, or even rows of trees can be used effectively as leading lines.
By incorporating these into your drone shots, you can create depth and a sense of movement. For example, fly along a winding river, making sure the water leads the eye toward a distant mountain or a point of interest. The trick is to experiment with different flight paths and altitudes to enhance the impact of these lines, making your footage visually compelling.
3. Symmetry and Balance
Symmetry is visually pleasing and can create striking compositions, especially when capturing large landscapes. Drone videography allows you to capture symmetrical patterns from above, such as the balanced layout of a city, a perfectly aligned row of trees, or even architectural structures. You can play with the symmetry by positioning your drone at a height that makes the symmetry more pronounced, creating a harmonious and aesthetically pleasing shot.
Balance, on the other hand, doesn’t always require symmetry. Sometimes, placing your subject off-center and balancing it with empty space (known as negative space) can create a powerful visual effect. This technique makes the subject stand out more while giving the shot a feeling of openness and room to breathe.
4. Foreground Interest
Adding elements in the foreground not only gives context to your shot, but it also adds depth and layers to your composition. This could be anything from trees, mountains, or buildings in the foreground, which help frame your subject. By positioning these elements in the bottom third of your frame or along the sides, you can make the viewer feel like they’re part of the scene.
In drone videography, you can use your ability to fly at various altitudes and angles to capture these foreground elements in a way that’s dynamic and engaging. Imagine shooting a mountain range where the foreground consists of sweeping fields, leading the viewer’s eye into the breathtaking peaks in the background.
5. Planning Flight Paths for Better Composition
A major advantage of drone videography is the freedom to control movement, which gives you the ability to plan your shots more effectively. Unlike traditional filming, you can map out how you want the camera to move and what you want to capture from various perspectives. This means you can plan to move along leading lines, change altitudes to emphasize symmetry, or simply fly in a way that brings more dynamic elements into the shot.
If you’re filming a landscape, think about how the lighting changes with the time of day and how you can fly to capture the best angle. Perhaps you start with a high altitude to capture the full scene, and then gradually descend for a close-up, all while keeping the composition intact
An example of this is using Waypoints feature with DJI drones:
Editing Software for Drone Videos
The right software can make all the difference in transforming raw aerial shots into stunning cinematic sequences. Here’s a look at some of the best options out there.
Adobe Premiere Pro
- Platform: Windows, macOS
- Level: Advanced/Professional
- Pricing: $22.99/month (subscription-based)
Widely taken to be the industry-standard, Adobe Premiere Pro offers extensive support for different file formats and has powerful editing features, including multi-cam editing, motion graphics, and sound mixing. Premiere Pro integrates well with other Adobe products, such as After Effects and Photoshop, which is particularly useful if you want to add complex visual effects or enhance your footage with detailed graphics.
One of the standout features of Premiere Pro is its intuitive timeline editing, which makes cutting and splicing drone footage relatively easy. While the learning curve can be a bit steep, once you become familiar with the software, you’ll be able to handle even the most demanding editing tasks. Additionally, Premiere Pro’s cloud-based storage option makes collaboration a breeze if you’re working with a team.
DaVinci Resolve
- Platform: Windows, macOS, Linux
- Level: Intermediate/Professional
- Pricing: Free (with a paid Studio version for $295)
DaVinci Resolve has an impressive suite of professional-grade features—particularly for color grading. With both a free and paid version, it provides powerful tools to fine-tune your footage, from automatic stabilization to motion tracking. If you’re working with 4K or even 8K footage, DaVinci Resolve is ideal, as it supports high-resolution exports and allows you to apply sophisticated color corrections to achieve that cinematic look.
Not only does it excel in color grading, but it also offers a variety of video editing functions, from trimming to multi-camera syncing, making it a great all-in-one solution. The interface might be a bit intimidating for beginners, but there are plenty of tutorials to help you get up to speed.
Final Cut Pro X
- Platform: macOS
- Level: Intermediate/Professional
- Pricing: $299.99 (one-time purchase)
Known for its fast processing speeds and integration with macOS, Final Cut Pro Xis especially well-suited for drone videographers who need to work quickly on large files. Final Cut Pro X offers a variety of advanced features, such as multi-cam editing, motion graphics, and 360-degree video editing—ideal for drone footage that captures immersive, wide-angle views.
One of its most praised features is the Magnetic Timeline, which automatically aligns clips and makes editing more fluid. It’s also optimized for high-resolution video editing, including 4K and beyond. If you’re a Mac user and need professional-level software that’s optimized for performance, Final Cut Pro X is a strong contender.
Kdenlive
- Platform: Linux, macOS and Windows
- Level: Intermediate/Advanced
- Pricing: Free
For those who prefer open-source software, Kdenlive offers a solid alternative. It’s available for multiple operating systems and supports a wide range of video formats. While it may have a steeper learning curve for new users, Kdenlive’s flexibility and growing library of features make it a fantastic option for more experienced editors on a budget.
VideoProc Vlogger
- Platform: Windows, macOS
- Level: Beginner/Intermediate
- Pricing: Free (with optional upgrades)
VideoProc Vlogger is beginners who want to edit their drone footage without a steep learning curve. Despite being a free tool, it packs a punch with features like video trimming, splitting, color correction, and noise reduction. The interface is intuitive, making it easy to use for those who are just starting out in drone videography. For those who need more advanced features, VideoProc Vlogger also offers upgrades at an affordable price
CyberLink PowerDirector
- Platform: Windows, macOS
- Level: Intermediate
- Pricing: $139.99 (one-time purchase) or $19.99/month (subscription)
CyberLink PowerDirector strikes a balance between ease of use and advanced functionality. It’s great for intermediate users who want more creative control without the complexity of professional-grade software. PowerDirector includes tools for multi-camera editing, motion tracking, 360-degree video editing, and more. Its simple drag-and-drop interface makes it a great option for those who want fast, high-quality results without investing too much time into learning complex software.
HitFilm Express
- Platform: Windows, macOS
- Level: Beginner/Intermediate
- Pricing: Free (with optional add-ons)
HitFilm Express is an excellent free option for hobbyists and beginner drone videographers. Despite being free, it offers many high-quality features like 3D compositing, special effects, and color correction. While it may take a bit of time to master, HitFilm Express provides a great entry point for those who want to explore more advanced techniques without investing in expensive software upfront. You can also purchase add-ons for additional features as needed
iMovie
- Platform: iOS and macOS
- Level: Beginner/Intermediate
- Pricing: Free
If you’re just getting started with drone videography and need something more straightforward, iMovie is a great place to begin. Available for free on all Apple devices, it’s user-friendly and offers basic editing tools like trimming, transitions, and filters. It won’t give you the depth of editing that DaVinci Resolve or Premiere Pro offers, but it’s perfect for simpler projects or quick edits.
The best editing software for your drone videos depends on your experience level, editing goals, and budget. For beginners looking for something simple with flexible editing suites, options like VideoProc Vlogger or HitFilm Express are more appealing. For more experienced editors looking for professional-grade features, Adobe Premiere Pro, Final Cut Pro, or DaVinci Resolve are excellent options. Each tool has its strengths, so take some time to explore them and find the one that best fits your workflow.
Related reading: How to Become a Drone Pilot: A Step-by-Step Guide
Color Grading And Stabilization During Post-Production
Let’s look at these two techniques and explore how they add value to your drone videos.
Color Grading: Enhancing Mood and Visual Appeal
Color grading is your opportunity to take the footage captured by your drone and give it that extra professional polish. This post-production step involves adjusting the colors, contrast, and brightness to create the exact mood you want. Whether you’re going for a warm, golden sunset look or a cooler, more dramatic atmosphere, color grading helps you achieve consistency and style across all your shots.
One of the most important tools in color grading is the Look-Up Table (LUT). LUTs are pre-set filters that help you quickly apply a desired color tone to your footage, saving time while still giving you creative control. For example, a LUT can instantly turn a neutral shot into one that looks like it was filmed during the golden hour. But be careful not to overdo it – subtlety is key in color grading to ensure the natural beauty of your aerial shots is preserved.
Another tip: If you’re shooting in RAW or Log formats, your footage will retain more information, giving you more flexibility to tweak the colors and tones without losing detail. Whether you want to make the sky pop or adjust the shadows for more depth, the goal is to make the footage look as polished and professional as possible.
Stabilization: Smoothening the Ride
To deal with any shaky drone footage – perhaps it got windy while you were flying the UAV or were making quick turns, you can use stabilization software.
If you’re editing your footage in software like Adobe Premiere Pro, you’ll find tools like the Warp Stabilizer, which automatically detects and corrects shaky footage. If you want more control, many programs allow you to manually adjust stabilization settings to fine-tune the result
The key here is to apply stabilization early in your editing process. Stabilizing first ensures that other edits, like color grading or adding effects, are applied to smooth footage, rather than trying to fix things after additional adjustments have been made.
When done correctly, both color grading and stabilization can elevate your drone footage from good to great. Color grading sets the tone, helping you tell a story with your visuals, while stabilization ensures the viewer isn’t distracted by shaky frames.
Exporting and Sharing Your Drone Footage
Now to share the video with the world. Whether you’re uploading to YouTube, Vimeo, or sharing on social media sites like TikTok, there are a few key steps and best practices:
Choose the Right Format and Resolution
This is to maintain video quality while keeping file sizes manageable. For most platforms like YouTube, MP4 is the ideal format, using the H.264 codec for efficient compression and playback quality.
- Resolution: Always match the resolution of your footage to the platform’s recommended settings. If your footage was shot in 4K, export it in 4K for the best quality. However, if your content will be viewed mostly on mobile devices or if you need to reduce the file size, 1080p is still a great choice.
- Frame Rate: Maintain the same frame rate as your original footage (typically 24fps, 30fps, or 60fps) to preserve the smoothness of motion.
Optimize Bitrate and Compression
Bitrate determines the overall video quality and file size. A higher bitrate results in better quality, but also a larger file size. For drone videos, try to strike a balance:
- YouTube recommends bitrates between 8-12 Mbps for 1080p and 35-45 Mbps for 4K footage at 30fps
- If you’re using editing software like DaVinci Resolve or Final Cut Pro, you can select preset export options for YouTube that automatically adjust resolution, bitrate, and frame rate.
While it’s tempting to push the bitrate to the max, but excessively high bitrates may result in long upload times and not noticeably better quality on smaller screens. Keep the file size reasonable for easy sharing, especially if you’re working with limited internet speeds.
Platform-Specific Adjustments
Each platform has different specifications, so adjusting your export settings accordingly will improve the viewer experience. For instance:
- YouTube: YouTube supports resolutions from 480p to 8K, but the sweet spot is 1080p or 4K. For a seamless upload, use an MP4 file with H.264 codec, and ensure the frame rate matches the original footage.
- Vimeo: Similar to YouTube, Vimeo supports MP4 with H.264 codec. It’s worth noting that Vimeo tends to prioritize higher-quality videos, so 4K or higher can help your footage stand out.
For platforms like YouTube, SEO (search engine optimization) can significantly increase visibility. Use relevant keywords in your title, description, and tags to help your video appear in search results. Additionally, don’t forget to share your footage on social media platforms like Instagram, Facebook, or TikTok if you want to reach a broader audience. Each platform has its own specifications for video dimensions and duration, so ensure your footage is tailored to fit. For example, Instagram Stories works best with vertical videos in 9:16 aspect ratio.
Common Challenges in Drone Videography
Battery Life Limitations
Drone batteries, particularly those using lithium-polymer (LiPo) technology, are built for high energy in a lightweight form. However, they often fall short during long shooting sessions. Although modern drones have made strides in battery efficiency, flight time still poses a challenge for videographers. Most consumer drones give you about 20 to 30 minutes of flight on a full charge, while professional models can last up to 40 minutes or more. Even so, that might not be enough for longer shoots or more complicated video work.
To get the most out of your drone’s battery:
- Plan Your Flights: Have a clear plan for your flight path before takeoff. Avoid unnecessary aggressive maneuvers that can deplete the battery quickly. Try to fly smoothly and steadily .
- Bring Extra Batteries: Keeping spare batteries on hand ensures that you can quickly swap them out when the current battery runs low. Make sure they are properly charged.
- Use Battery Monitoring Tools: Built-in telemetry systems monitor battery health and remaining flight time. Pay attention to these readings and be ready to land when the battery reaches around 20-30% to avoid potential issues
- Use Portable Charging Stations: Units like the DJI Power 500 and Power 1000 give you a reliable power source to recharge multiple drone batteries while out in the field. Additionally, many stations support fast-charging technologies, significantly reducing downtime during battery swaps. Plus these stations typically have various output ports to power other devices like laptops or smartphones.
- Optimize Battery Care: Always store your batteries at the right charge level (around 50% for long-term storage), avoid overcharging or undercharging, and keep them clean and free from debris.
Environmental Factors
Wind
While drones are designed to handle moderate wind, strong gusts can affect stability and lead to shaky footage, or worse, a crash. Drones like the DJI Mavic series can handle winds up to around 20-25 mph, but anything beyond that can make control difficult. Check the manufacturer site for the wind resistance levels of your particular drone. If winds are above the recommended limits, it’s best to postpone.
Rain and Moisture
Drones are not waterproof. They do have varying levels of resistance though –the Ingress Protection (IP rating) indicates what they can handle.
Flying in rain or snow can damage the internal components of the drone, including the camera and gimbal systems. If you’re caught in light drizzle, land immediately to avoid moisture buildup. On the other hand, if the forecast calls for heavy rain or snow, you’d rather stay grounded. Drone-specific waterproof covers are available, but even these can’t protect your drone in heavy storms, so keep an eye on precipitation patterns during your shoot.
Temperature Extremes
In cold weather, battery power can drop quickly, which can shorten your flight time. In hot weather, the motors work harder, and this can cause overheating. Ideally, try to avoid flying in temperatures that are too hot or too cold for your drone’s recommended operating range. If you absolutely must fly in extreme temperatures, consider taking extra batteries and keeping them warm or cool in insulated cases to prevent quick depletion.
Fog and Low Visibility
Fog can severely limit your ability to see your drone – yet one of the most common rules across jurisdictions is that you must maintain a visual line of sight with your drone. If visibility is poor, it’s safer to delay your flight until conditions improve. Additionally, fog can create moisture that may affect the drone’s electronics, so it’s best to avoid flying in foggy conditions whenever possible.
Humidity
High humidity can also pose a problem over time. While not as immediately threatening as rain, high levels of moisture in the air can eventually cause rust or corrosion on your drone’s parts if flown frequently in such conditions. Keep an eye on humidity levels, especially if you’re shooting near bodies of water or in tropical environments.
Technical Difficulties
1. GPS Signal Loss
Without a reliable GPS signal, your drone may lose its ability to hover steadily, return to its home point, or follow precise flight paths. GPS signals can be affected by issues like interference from tall buildings, dense foliage, or power lines. Flying in areas with high magnetic fields or near large metal structures can also disrupt the signal, resulting in “GPS-denied” environments.
To address weak or lost GPS signals, always fly in open areas with minimal obstructions. If you notice signal issues, try repositioning your drone to improve satellite visibility. Some drones, especially those with advanced GPS systems, can recover their signal by simply adjusting their height. Ensure that your drone’s GPS module is undamaged and properly connected. If problems persist, check for firmware updates.
2. Camera and Gimbal Malfunctions
They can case blurry images, poor video feed, or shaky footage. These problems are often due to dirty lenses, firmware glitches, or physical damage to the gimbal. Regularly clean the camera lens with a microfiber cloth, and ensure that the gimbal is properly calibrated. If the issue is persistent, check for software updates or reach out to customer support for further troubleshooting.
3. Propeller and Motor Issues
If you encounter unresponsive motors or propellers that won’t spin, it could be a sign of a mechanical or electrical malfunction. Inspect the propellers for damage, ensure they’re securely attached, and check for any obstruction. Additionally, verify that the motor connections are intact. If the issue seems more complex, such as a malfunctioning motor or motor controller, it’s best to seek professional repair.
4. Overheating
Overheating can occur if you fly your drone for extended periods, especially in hot conditions or direct sunlight. It impacts the drone’s battery life and also risks the internal components malfunctioning. You can avoid cases of overheating by letting your drone cool down between flights.
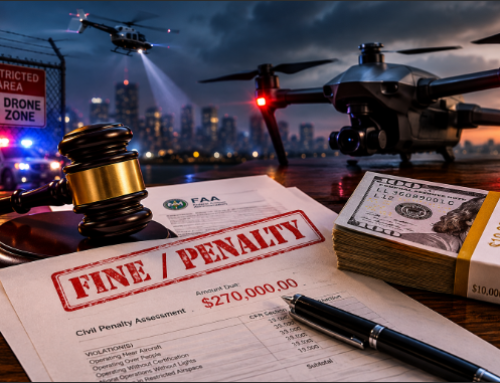
Legal Issues
Airspace Restrictions
Drones are subject to airspace classifications governed by the Federal Aviation Administration (FAA) in the U.S., and similar regulatory bodies in other countries. For example, the UK’s Civil Aviation Authority (CAA) has specific rules for flying drones, and in Australia, the Civil Aviation Safety Authority (CASA) governs drone operations.
Always check local regulations before flying. Apps like B4UFLY provide real-time information on no-fly zones and temporary flight restrictions (TFRs).
- Controlled Airspace: This includes areas around airports or busy air corridors. Drone flights in controlled airspace require special permission or clearance, and this often involves applying for a waiver or using an approved system like LAANC (Low Altitude Authorization and Notification Capability).
- Uncontrolled Airspace: Often found in rural areas, this type of airspace does not require approval to fly under 400 feet, but you still need to avoid flying near airports or other restricted areas.
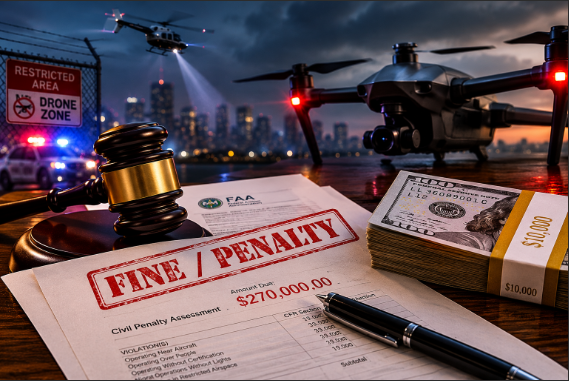
- Restricted Airspace: This includes places like military zones, national parks, or any high-security areas. Flying drones in these zones is strictly prohibited without explicit authorization. Violating these restrictions can lead to severe penalties
Recreational vs. Commercial Use
Recreational drone operators must adhere to the basic FAA guidelines, such as flying below 400 feet, maintaining a visual line of sight, and avoiding flights over crowds. However, commercial drone operators—those who use drones for videography services, real estate, or any form of paid work—must obtain a Part 107 certificate from the FAA. This certification ensures that drone pilots have the necessary knowledge of airspace regulations, safety protocols, and emergency procedures.
Prepare for the FAA exam with the Part 107 Preparatory Online Course
Also note that drone videography can sometimes unintentionally infringe on people’s privacy – like when you fly over private properties or capture footage without consent. Many states have specific privacy laws governing the use of drones for photography, so be sure to be on the right side of the law for your jurisdiction.